3. Overlay objects
читать данную статью на русском
It's time to find out how we are going to simulate the fall of the ball in the hole.
Content
page 1 - Sprites
page 2 - Objects
page 3 - Overlay objects
page 4 - Coding - Setting parameters for the Scene Editor fge and write code to display the sprite ball in your first gaming application
page 5 - Show jumped ball
page 6 - Loading game scene
page 7 - Moving game scene
page 8 - Closing of the scene from the cavities by means of a black texture with a slot, restricts the movement of the scene
page 9 - We realize getting into the correct hole and around the holes - holes define the boundaries of sprites and sprite jumped ball
page 10 - Testing collisions
page 11 - Game score, sounds, music
Nothing is impossible, you probably guessed that just need to take the block floor_front, define the right scale factors for it xScale, yScale, as they change, as well as the procedure to set the value of the previously described z = 0.76
Then simply insert the blocks in the right places of the scene, where there are holes.
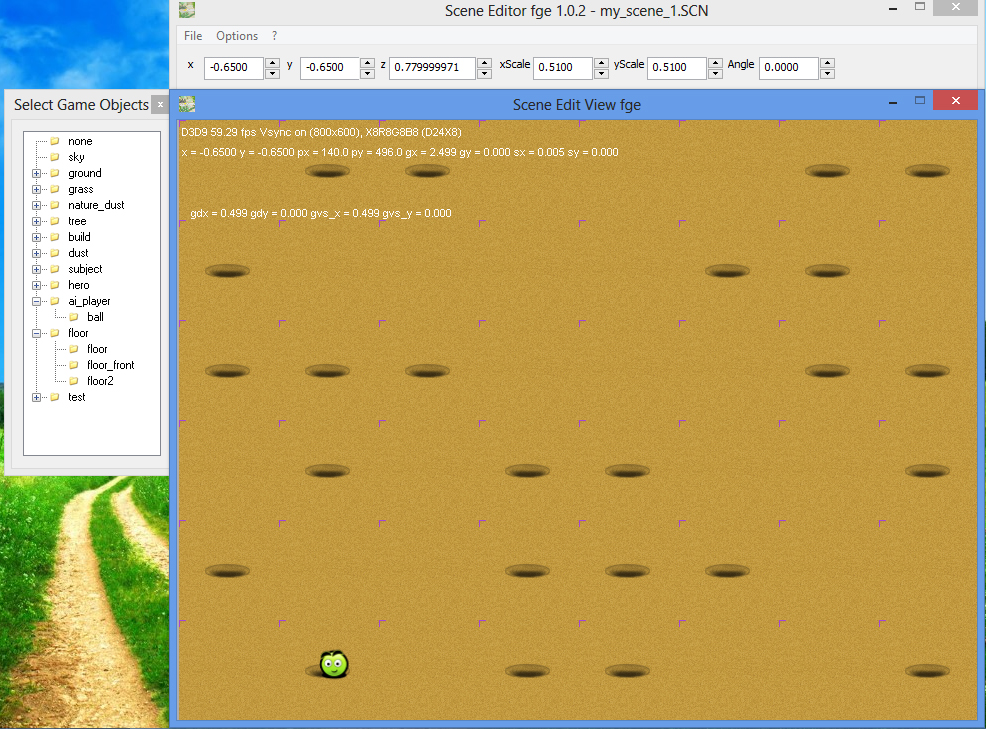
However, it just sounds "just", indeed you will encounter difficulties - block
floor_front merges with the block
floor and when it is already inserted it is very difficult to see it is inserted or not. In addition, the error can be inserted in the same place a few blocks, because obviously you can not see how many of them there is not going to click on these blocks of the scene, until the dialog box of their choice appeares.
Will the complexity and with determination to
floor_front coordinate z. If you forget to turn off the option Options > Auto Calc Z.
I therefore propose to the other - a simpler and more rational way.
To do this, simply create a new scene - File > New
Next, select the object in the left panel
floor_front, first set the correct scale if it is different for it from 1.0. To do this, you will remember, you first need to select an object
floor_front and force the desired value, ie xScale = 1.0, yScale = 1.0
Now disable the option Options > Auto Calc Z and set the force z = 0.76
Arrange the blocks in areas of the scene where you are on the idea of the holes. Like this -
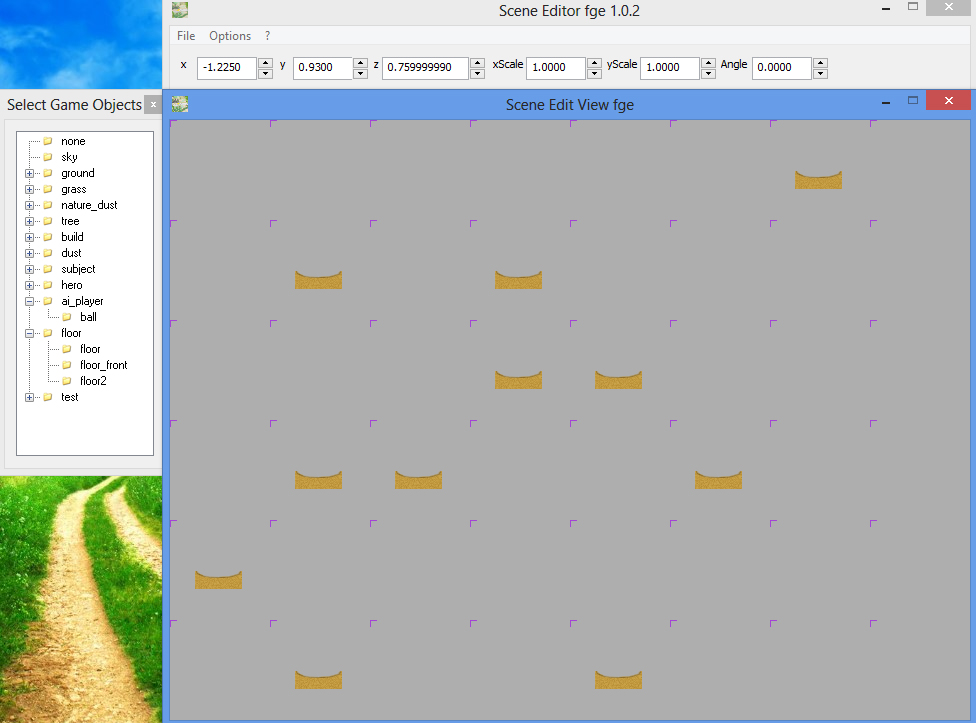
Now you will not get confused about where to put the block front of the holes, and where not. You just have to re-enable the option Options > Auto Calc Z and now add blocks to the back of the holes - using an object
floor.
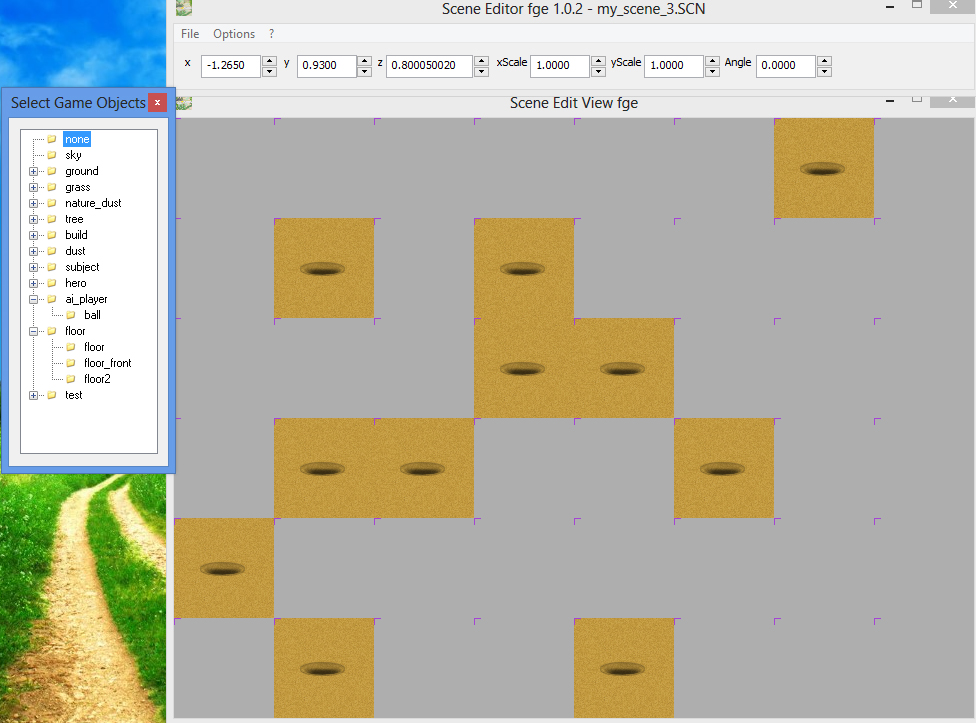
Well, you have only to add a block
floor2 in those places of the scene where the holes will not and the scene be ready !

Save the result of you labor.
You can still take the ball and could move around the stage to make sure that it falls into a hole when you hover over them. For a ball to be forced to the given coordinates z = 0.78, and option Options > Auto Calc Z should be disabled !
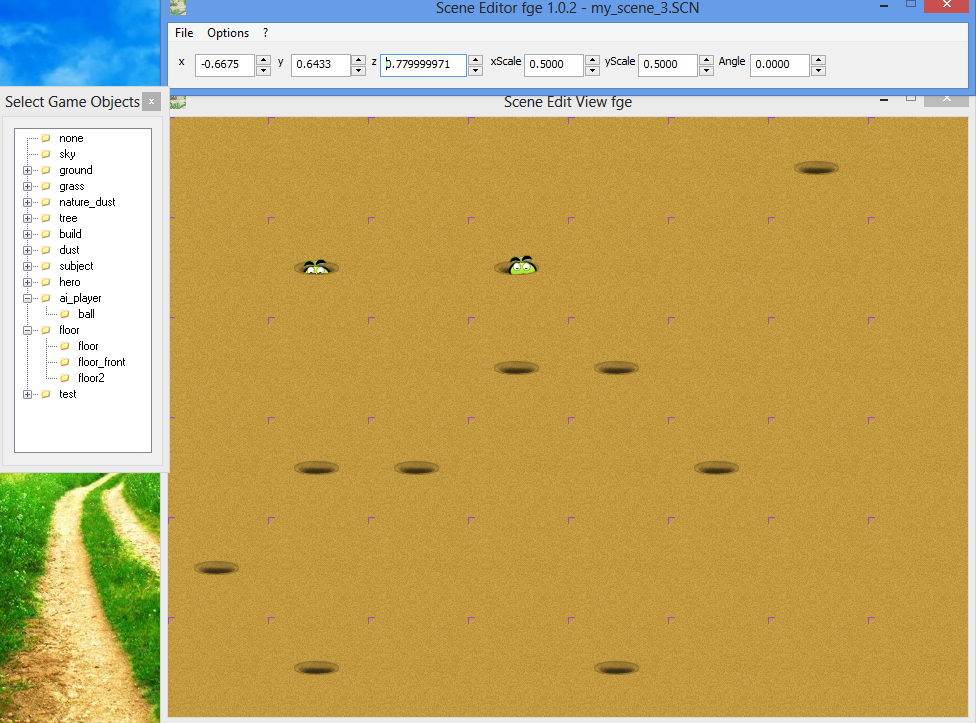
For clarity, I have added in the stage 2 of the ball. You can add them as you like, but in general we have the ball to be only 1. Unless of course you do not change the idea of the game as follows: that with an increase in the level of complexity is displayed 1, and more balls and the player will have to try to move the floor so that It got into the holes as many balls!
So, after the completion of the experiments we remove all the balls from the scene, or just use the saved version of the scene in which you have not added a single ball. If there are not - create all over again as described above, with the ball in the scene do not add and save the result of you work.
Our gaming scene is ready. On page 4 we will deal and subsequent programming of our game: the ball will have to dodge the holes, the floor should be a move from mouse movements well, etc. But first, of course the scene file and all game resources must be loaded to your game app. Yet you probably want to add to the game sounds and music. All this on next pages.
[previous] [next]
